Week 19: April 1st 2001:

Man oh man, what a busy weekend.  Let’s see, here’s the list:

I installed the radiator, radiator fan, thermostat
Installed the front fog lamps and wired power
Installed the coil
Finished hooking up all the fuel lines and fuel filters
bolted in the rear end
installed fuel tank heat shields
installed exhaust system
installed the mud flaps
installed the front braided brake hoses
Ran wire everywhere
Got new rear bump-stops from Rimmers installed

Issues: 

The front brake pads I bought don’t look to healthy, I’m taking those back so I couldn’t bleed the brakes.
I have to figure out how to do a rear handbrake.. I’ve got some ideas, stay posted.

Radiator:

Coil:

Front Fogs:

Radiator Fan:

Heat shield, bump stop, exhaust:

Braided brake hose:

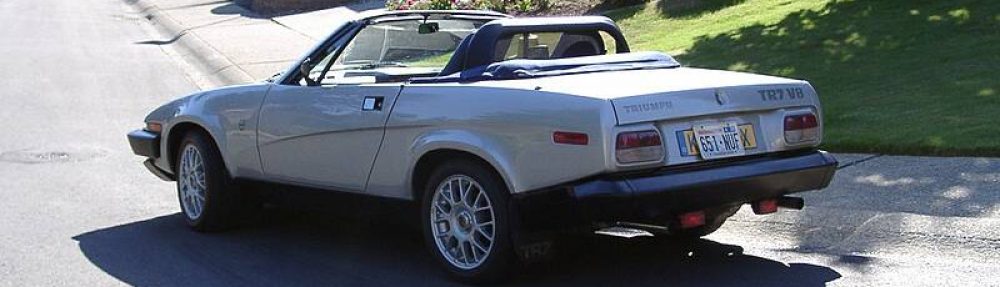
Painted rear drums, exhaust:

Left hand header is now installed.  The Right hand header needs to be modified to fit w/ the supra transmission:

Week 18: March 25th 2001

This weekend I installed the the rear axle & plumed up the fuel lines.  I put the rear tires on and lowered the car down onto the wheels so I could take the measurements necessary to have the drive shaft made.  I broke a few plastic clips (bugger) so I’m going to see if I can find a few of those around.  I have installed a TR8 Tach into my instrument panel so I have the correct red line.  I’ve now just got to finish a little bit of wiring which I plan on doing a little bit at a time after work this week.

Once I get the drive shaft installed, I plan on putting fluid in the transmission and then putting oil in the engine.   Finally, in the next few weeks or so, I will have to have the right hand header rebuilt so it’ll clear the transmission.  Argh!  There are a few photos at the bottom with the car on all four tires, It’s now back on jack stands because I need to get under the car and figure out how to get the hand brake working.

Woody’s ford axle conversion: (RH view):

LH view: (SPAX adjustable shocks installed w/ uprated 200lbs S&S Prep springs

Side profile view:

Front corner profile:

Week 17: March 11th 2001

More wiring this weekend.  Front and rear fog lamp wiring installed.  I have hooked the fuel injection wiring harness into the main harness and installed the fuel pump inertia cutoff switch.  I hooked up the trunk light and the rear license plate lamps.  A hole was drilled into the bulkhead to allow the main battery lead to hookup to the starter motor.  The brake lines were all installed and the master cylinder was finally bolted on to the booster.  I installed the speedometer cable from the supra transmission and finally, the dashboard was installed.  I got the rear suspension components back from being powder coated.  If you take a look at the trailing arms, you notice that I welded on some sheet metal on the top of the arms.  this will greatly increase the stiffness of the arms.  I put poly bushings in the ends that will bolt onto the car and rubber where they bolt onto the rear end.  This was on the recommendation of the TR8 web site.

Dashboard installed: (RH view):

Dashboard installed, LH view:

Rear suspension components:

Sheet metal welded on to increase stiffness:

Week 16: March 4th 2001

My goal for this weekend was to do as much of the wiring as I possibly could.  I managed to get the main wiring harness in the engine compartment done, the fuse box installed as well most of the harness in the dashboard area.  The indicator lights are done, so are the headlights, sidelights, brakes, wiper motor, wiper washer motor, & the heater blower.  Excellent progress!

Front of the car with the grille now installed:

Ok, here is a picture of the installed fuse box. The red wire that you see is taken from the battery that is just sitting in the trunk (not installed yet).  Since the battery in the TR7 is in the engine compartment, the harness has the wires to get power there.  The red wire runs from the battery to the two main wiring harness brown wires to provide power.

Ignore the clutter, just look at the instrument cluster:

Here you can see the main harness installed.  It’s not all pretty yet but will be by next week:

Headlights turned on & pods raised:

Week 15: February 25th 2001

Put the doors together, installed the front bumper, and got the windscreen wiper motor installed.  I also repainted the dashboard and finished installing the steering column:

Repainted dashboard pieces:

UK front bumper installed w/ UK lenses (and fake UK plate…)  🙂

Doors put back together:

Windscreen wiper motor installed:

Week 34: February 22nd 2002:

A Trip to the Upholstery shop…

The TR7 has been in the Upholstery shop for about a month having a bunch of little things done.  First off, the mohair blue top has been installed – the shift boot cover modified for the supra transmission and the leather seats were redone with much better foams and a lumbar support has been added – It’ll make those long trips nicer (like the trip to Colorado).  I also have put on a set of TSW wheels – I think it gives the car a much nicer aggressive stance.  Enjoy!  Let me know what you think!  All of this work was done by Joe Rodia’s Eurosport Upholstery Shop in Seattle, WA – He was awesome – I highly recommend for anybody in the Seattle area – Update – Joe is no longer in business – I recommend Randy @ Accel Auto in Kirkland instead now.

Nice shot with the wheels:

Soft-top – After a lot of work, it fits rather nicely.  Ignore the shoddy seats – I put those in so I could continue to drive while the leather ones were being rebuilt:

Back view of the top:

Week 14: February 11th 2001

Another busy weekend.  I as able to get the TR8 front suspension all installed as well as take out the rear TR7 suspension.  I have not yet gotten the Ford rear end from woody but I expect it in the not to distant future.  Here are pictures:


Front TR7 suspension all taken apart.  After 25 years, still the original Armstrong shocks..  Don’t people realize shocks go bad??

New springs and spax shocks:

Complete left hand strut:

New sway bar (up rated from Ted at TSI. poly bushings & an anti-dive kit):

Front right wheel installed and car on dollies:

Left side view:

Getting ready to drop the rear end:

Rear end dropped:

Rear axle:

Rear minus axle:

Week 13: February 4th 2001

Busy weekend.  Saturday, while the car was at the body shop, I installed the rear tail lights, side lights, trunk prop, trunk seal, and other misc pieces.  Saturday evening I got the car over to my garage and finished a few things.  I got the pedals, master cylinders, and wiring harness installed as well as the rear UK spec bumper.

Sunday was a busy day.  I got the TR7 front suspension out and installed the V8 and transmission.  Here are pictures:

Left side shot, you can see the rear lights installed

Front side shot:

Front shot

Trunk shot

Rear right shot

Front shot, see the master cylinders?  😉

Closeup of cylinders

Pedals installed

One final shot of the engine on its dollies

Front TR7 suspension, wow, it came out easy!

Lift the car up!

Front shot:

Lower the car down (slowly)

All bolted in!

Transmission lines up!

Nice shiny headers

Front bumper and spoiler installed

Week 12: January 20th 2001

Finished working on the power train, the engine and transmission have been bolted together, I have had to make a custom lower bell housing shield as well as a custom bracket for the alternator.  I have installed a new GM alternator (with a double pulley so they belt lines up).  Everything is ready to install into the car when I’m finished with the body.  At the bottom are some shots of the body painted.

Alternator mounted w/ elusive water pump pulley:

Transmission bolted up:

Ted’s gear reduction starter installed

Body Shots:

Week 11: January 13th 2001

A little more progress on the body work.  Most of the bulkhead modifications necessary are complete and the panels are being smoothed out before painting.

RHD Bulkhead modifications just about complete:

Left bulkhead almost complete (except for wiring harness and getting rid of the old steering column bracket):